If you’re a daily Google Docs user, you already know that the word editor has gotten better and better the past few years. In 2022 especially, Google has added quite a few additional features that’ll definitely make your life easier. So, if you’re among those users who find it hard to constantly keep tabs with what’s new, look no further. Here are this year’s updates you shouldn’t miss:
1. Emoji reaction
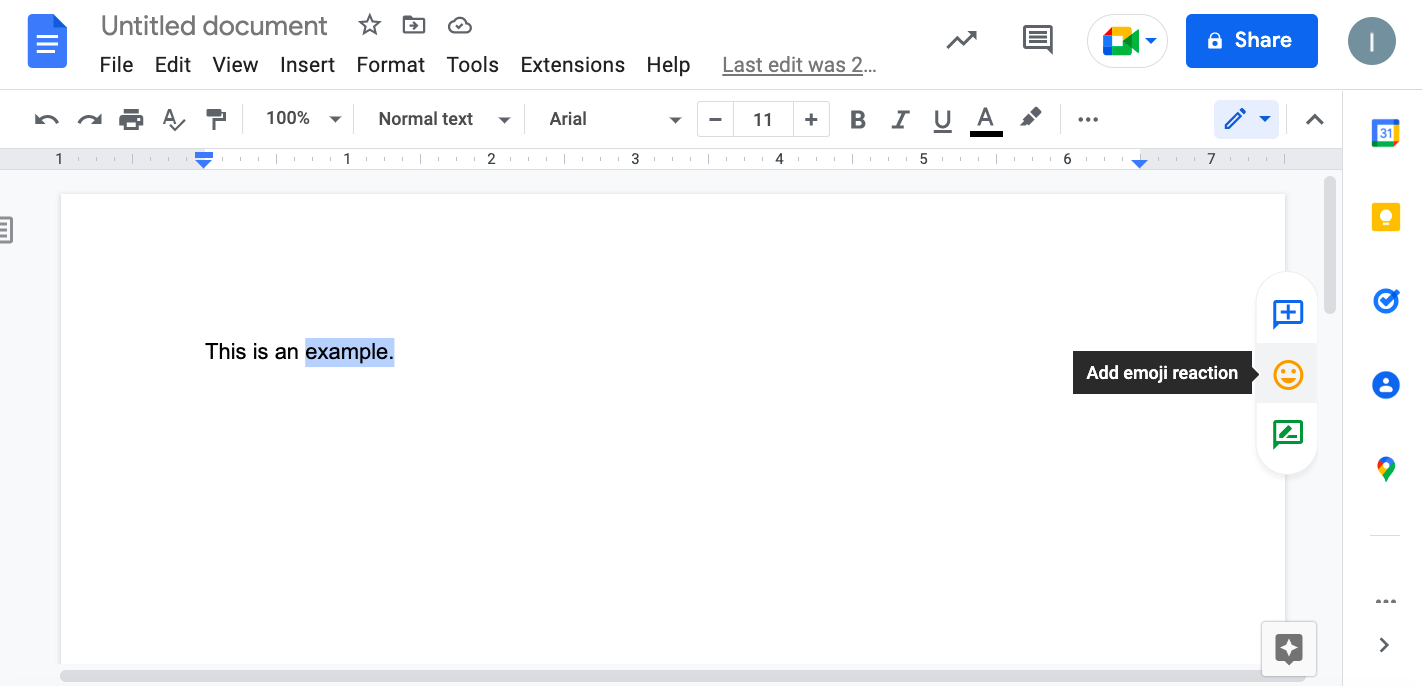
For those times that words fail you (or you’re too lazy to type), Docs allows you to respond to text with a simple emoji, rather than a fully written comment.
Highlight the word, sentence, or paragraph you want. Click on the emoji icon on the right (underneath the comment icon). Choose the emoji from the displayed list.
2. Pageless format
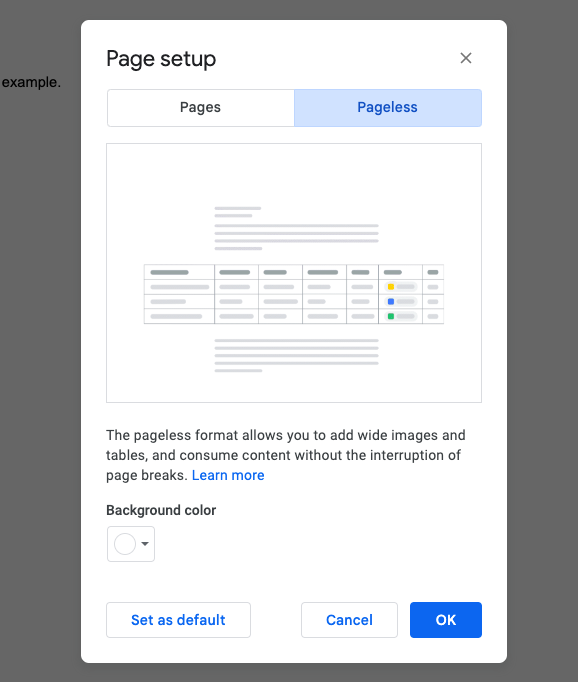
Sometimes you need to ditch annoying page breaks, especially if you want to insert wide tables or images. You can set up your Doc to pageless so that it continuously scrolls without page breaks, making it easier to read and print.
Go to File and select Page Setup. At the top of the dialogue window, select Pageless. Click OK to confirm.
3. Table templates
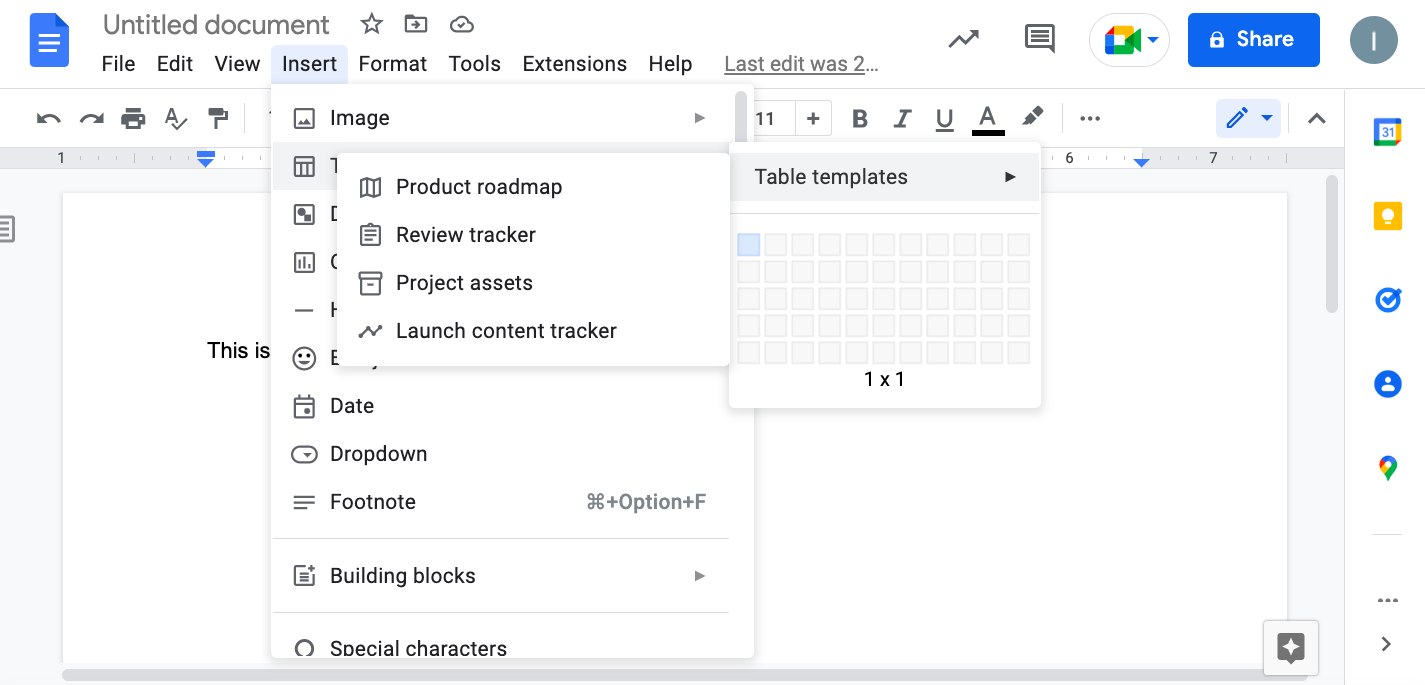
Hate creating tables from scratch? I feel your pain. Instead, you can choose one of the four tables available — they don’t offer much variety, but the feature can be very useful for monitoring work and product development progress.
Click on Insert > Table > Table Templates. Choose between Product Roadmap, Review Tracker, Project Assets, and Launch Content Tracker.
4. Drop-down menu
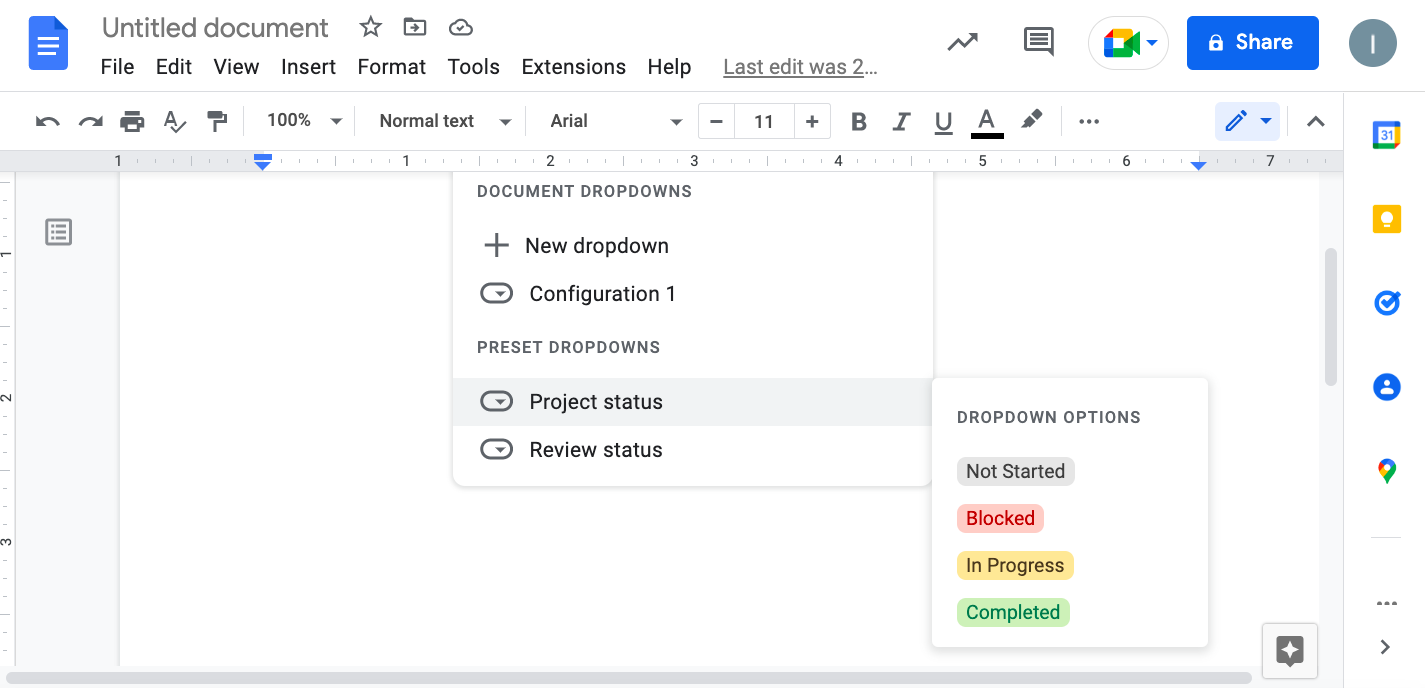
Drop-down lists are handy tools when entering data. They offer the choice of input, without creating a mess in the document, and you can use them to select a status for a project, answer a question, choose a location — you name it. Google Docs offers both preset and custom drop-down menus to fit any document.
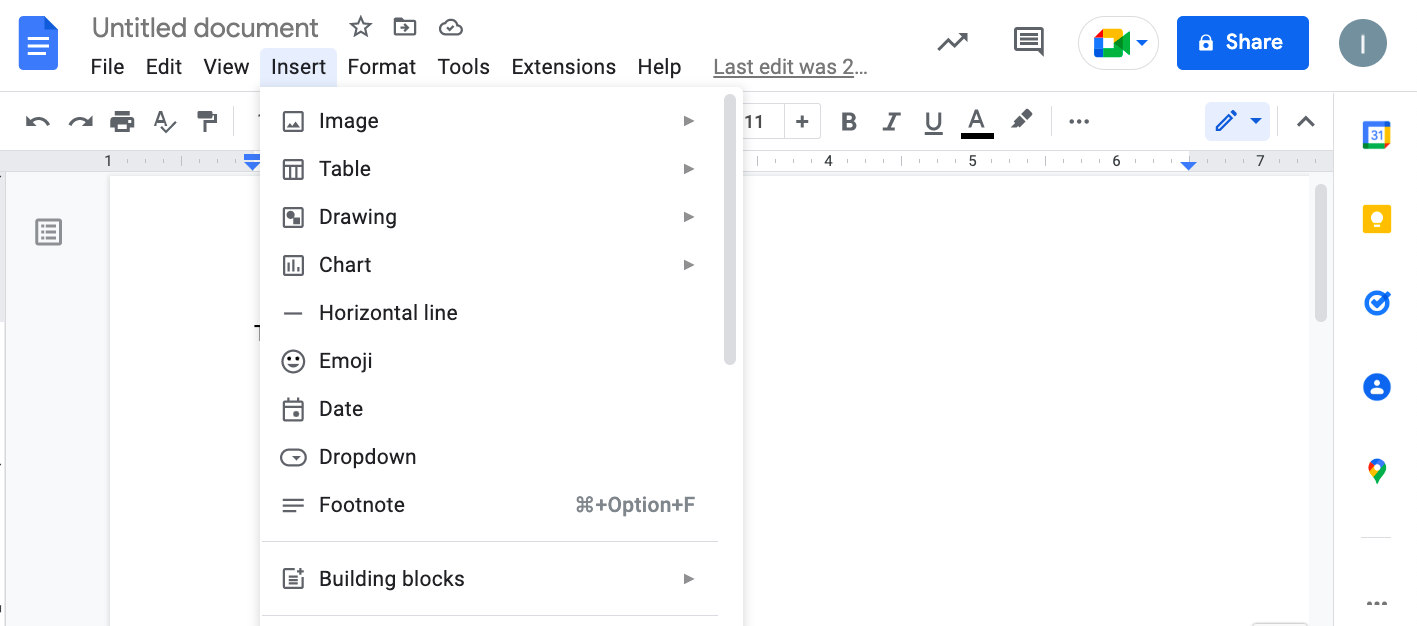
Select the spot where you want the drop-down. You can place it anywhere in the text or inside a table. Click on Insert > Dropdown.
Choose between Preset Dropdown to insert the Project Status or Review Status menus.
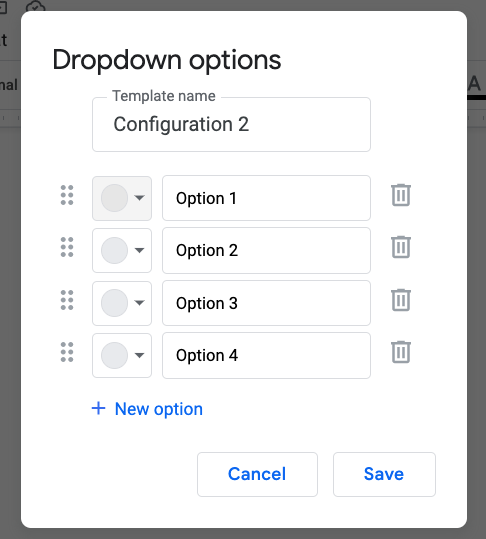
Choose New Dropdown to create a custom list. You can name it, add items, and choose colors for each of them. Click Save when you’re finished.
5. Add a summary
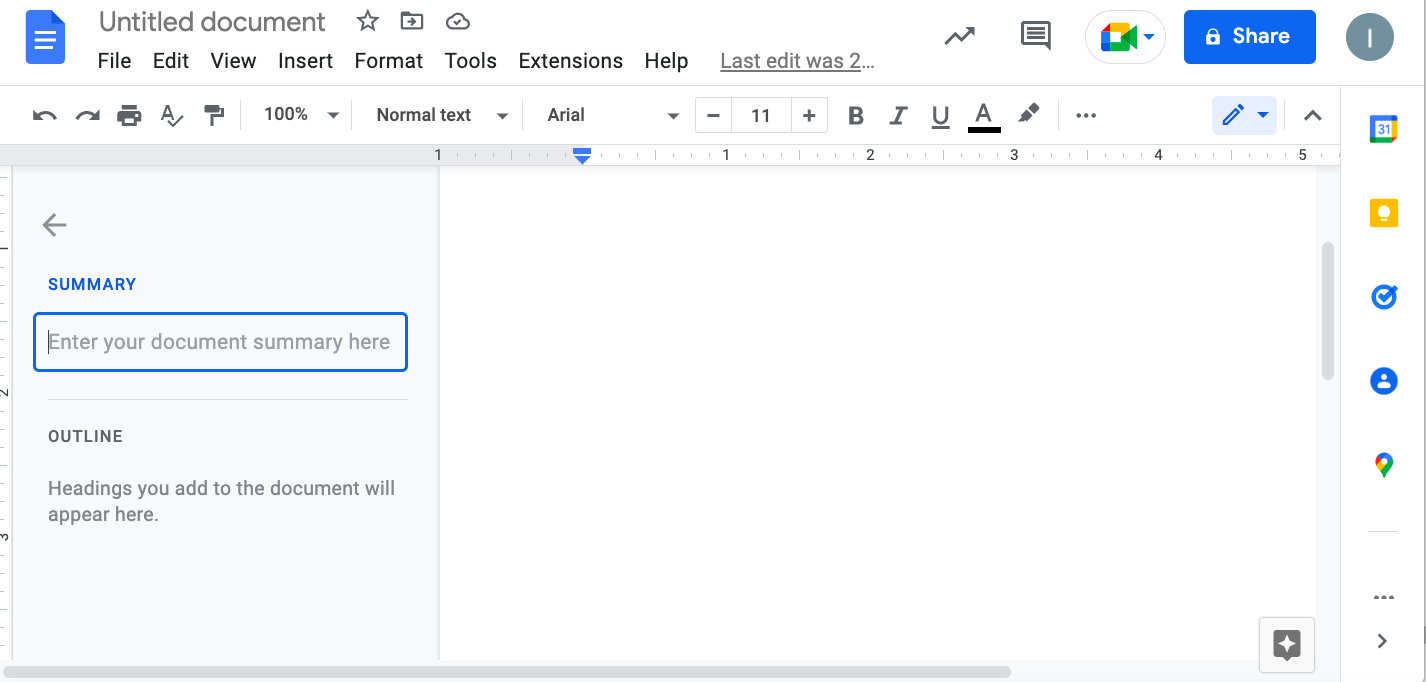
Summarizing your document and calling out important points is both time- and labor-saving.
Click on View > Show outline. A text box appears on the left. Click the + icon to start typing your summary. Press Enter to save it. To edit at any point, move your cursor over it, and click the Edit Summary icon (pencil).
Take these features out for a spin and thank me later!
